Monday, September 30, 2013

Happy Harvest Kitty

Happy Monday Everyone!  I hope your weekend was fabulous and you're ready for a fresh new week.  Kendra here today with a super sweet little image called Pumpkin Kitty.  


For the pattern paper I used the Harvest Lane collection from Simple Stories and colored my image with my Spectrum Noir Markers. Colors used: FS2, FS3, TN2, TN3, TN4, TN6, DG2, DG4, PP4, PP5, OR1, OR2, OR3.


You can download this image instantly from the Whimsy and Stars Studios store ~ which means you can download it NOW and then just print it & go color!

Sunday, September 29, 2013

Happy Haunting!

Happy Sunday!  I can't believe it's the end of September, and we're already starting to think about Halloween! I love creating Halloween cards, and Mabelle has created the most darling images for
the fall season.  You can find this sweet Halloween Girl in shop and ready for instant download.

Thanks for taking a peek - enjoy your day!  Cathy xxx

Saturday, September 28, 2013

Blessed Harvest

Happy Saturday!

Debra here...Today, I have a card using one of Mabelle's fabulous Fall images.  This is "Blessed Harvest", another favorite of mine.

Instant Download Digital Stamp: Blessed Harvest

A close up of the colored image.
Supplies --
Image: MRO Blessed Harvest
Patterned Papers: Simple Stories Harvest Lane
Sewing machine with cream thread
Copic Colors: E30, E31, E33, E35, E37, YG91, YG93, YG95, YR12, YR15, YR18, YR23, YR24, BG10

Thanks for stopping by...
Blessings,
Deb

Friday, September 27, 2013

Alex's Pumpkin

It's my time to share another creation using Whimsy & Stars Studio's fabulous stamps!!

Today I'm using Alex's Pumpkin. Isn't he a cutie? I seriously just love autumn and Whimsy & Stars Studio sure has some of the cutest autumn stamps around!!


Have a super fabulous day! Hopefully it's a great autumn day for you!!


Thursday, September 26, 2013

LUCY'S CUPCAKE!

Hi everyone!  It's Audrey from the DT here with you today, Happy Thursday!  Only 1 more day til the weekend - woo hoo.   I hope you are all having a fabulous week.

Today I want to introduce you to LUCY'S CUPCAKE which you can find at WHIMSY AND STARS STUDIO SHOP and it's available for Instant Download - yay!!  I had so much fun coloring this beautiful image.  All of Mabelle's images are great for coloring!


I have colored LUCY'S CUPCAKE with Copics.  Once again, I have been playing around with some more daring Copic color combos and techniques, and I hope you can see the results on this card.  I added Stickles for the frosting on the cupcake after coloring it with Copics.  I have used papers from GCD DP and Bazzill CS.  I added bling from Me and My Big Ideas and this wonerderful sentiment from Dorcerela.  Image cut out with MFT die.  Sentiment cut with Lifestyle Crafts die.  Remember, LUCY'S CUPCAKE and all the other of Mabelle's FABULOUS images are available at WHIMSY AND STARS STUDIO SHOP.
Hugs!!

Monday, September 23, 2013

Welcome Fall!


Fall is here and with it comes cozy sweater, hot cocoa and lazy days! I love Fall and I was excited to colour this adorable little boy drawn by Mabelle.

Instant Download Digital Stamp: Alex's Pumpkin


Mabelle has all sorts of sweet Fall, Halloween and Christmas images in her online store. What will you be doing during the Fall season?

Sunday, September 22, 2013

Autumn Angel


Fall is in the air around here. Crisper weather, cooler weather and even cold in the mornings and at night.  It is my favorite time of year. A perfect time to color up some autumn images. I've got a cute card here to share, using Autumn Angel from Whimsy and Stars Studio. Love this sweet little image, she was so much fun to color, I added plenty of sparkle to her wings.

Thanks for stopping by today. Hope you are having a wonderful weekend!

Card Recipe:
Image: Whimsy and Stars Autumn Angel
Ink: printer
Paper: copic xpress, PTI Dk. Choc, PTI Kraft, BoBunny prints
Extras: copics, dimensionals, white sharpee, SU brads, PTI twine, EK Success large leaf border punch, MS border punch, stickles

Saturday, September 21, 2013

Spooky and Sweet...

Hello everyone! Angela Kelley here with a sweet little Halloween card featuring "Halloween Girl". This is one of my all time favorite Whimsy and Stars images, I think because it reminds me of my daughter when she was little. I added some hot pink to my Halloween mix of colors, just to change things up a bit! She is colored with Copic markers: E01,00,000, -Skin R20 (cheeks) E99,97, YR21-Hair RV19,66,55, BV02,04,08, YG17,03,01 Dress and Hat YR09,16, Y38- Pumpkin
Hope that you are having wonderful day today!!

Friday, September 20, 2013

Acorn Girl

Happy Friday! I'm here today sharing a card made with this adorable image: 
Available for IMMEDIATE DOWNLOAD


Isn't she just the cutest!? 

Thanks for stopping by today and I hope you have a blessed weekend♥
Marcee @ INKyBird

Thursday, September 19, 2013

Autumn Harvest

I'm thrilled to be sharing one of Mabelle's fabulous fall creations with you today, "Acorn Squirrel".    She is getting ready for a long cold winter by harvesting acorns:


I just love that adorable bonnet!  She is available as an instant digi download in the Whimsy and Stars store here.  There are also other new fall creations to choose from.


Thanks for stopping by today!  Whimsy and Stars has rubber stamps and digis that will suit your every need.   We would love for you to visit the new blog and show us your creations on our Facebook page!

Wednesday, September 18, 2013

Hello Cutie Pie!

Hello Cutie Pie! Today is The Scrapbooking Queen day
to create and inspire you ! So today The Queen
created this adorable card for you..
How sweet is this little bee girl holding a bunch of flowers 
Can you just say CUTE! Her name is Mimi Bug Gardner
and you can get her at the Whimsy Star Studio 
Instant Download Digi Stamp: Mimi Bug Gardener 
This cute card has a soft pastel palette to match the 
flower bouquet are adorable digi is holding it from the paper lines
Pure Bliss and Little Bo Peep 
The Queen added some brads also from Pure Bliss Collection
Cute Sentiment sticker fit perfectly on the boarder created
using a Martha Stewart Floral Punch 
Now don't forget to follow the Whimsy and Star Studio Blog
That way you can come visit us all and be inspired by
our awesome Whimsy Designer
Royal Hugs

Tuesday, September 17, 2013

I've Got My Eye on You!

Good morning friends!  I am really happy to be your blog hostess today!  It's always fun to see what each design team members comes up with each day!  Today, I am using one of the summer releases from Whimsy & Stars Studio Store called Searching Girl. . .take a look. . .


Isn't she the cutest?  I just love this image!  I found a perfect little sentiment to match, which I borrowed from My Favorite Things.  But this image is so wonderfully versatile - so many ideas for sentiments. . .

"I SEE you had a birthday"

"I'm ready for my close-up"

"I can SEE clearly That I Missed Your Birthday"

"Time to Focus on Our Friendship"

The possibilities are ENDLESS!  Speaking of close-ups. . .here's one of the spyglass where I used Crystal Lacquer to create the "glass". . .


Just a reminder that all of the Whimsy & Stars Studio images are available as immediate downloads from the Etsy store!  No waiting on snail mail to get your images!  Just click and print!  Instant gratification! 

I look forward to seeing you around the Whimsy & Stars Studio blog again soon!  Until then, "I've got my eye on you!" 


Monday, September 16, 2013

Treat Topper Tutorial with Halloween Girl!

Hi, everybody! Suzanne here with a treat topper tutorial to share with you featuring "Halloween Girl," one of the many cute Fall digis in the Whimsy and Stars Studio Store!
 
I know it's mid-September, but if you're planning make a bunch of these to give to friends or your child's classmates for Halloween or at a fall get-together, it's not too early to get started!
 
(Note: For this tutorial, I'm using some designer paper from my stash. That way, you can make these with paper you might already have on hand, or adapt the project for a different holiday or event!)
 
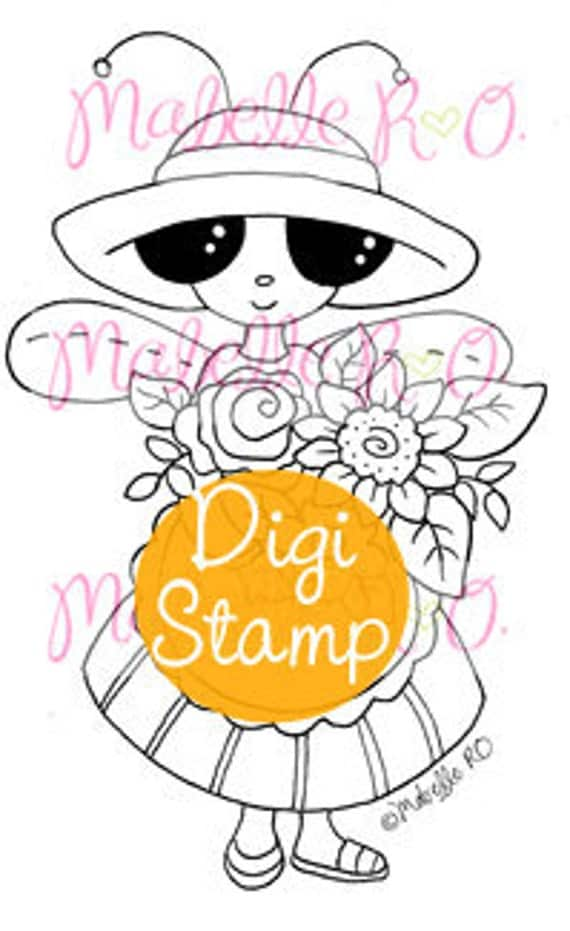
(I find it's helpful to create a document just for printing digital stamps that has a measured grid so you can resize the digis to what you need for a particular project.) I sized this digi image so it was about 2 1/2 inches in size when I cut it out.
 Here's what you'll need to make this project: 
  • Printed digital stamps (I'm using "Halloween Girl" by Whimsy and Stars Studio)
  • designer paper
  • cardstock (I'm using black smooth cardstock)
  • Circle punch (2 1/2") or metal die
  • Large metal label die (you can also use a cut file if you have one that you like; I'm using Spellbinders Labels 25)
  • Oval metal die
  • Coloring medium (markers, pencils, etc.)
  • Sentiment stamp and ink
  • Treat bags (clear or glassine/frosted)
  • Strong adhesive of your choice
  • Candy or other treat of your choice 
Optional supplies:
  • Fancy circle metal die
  • baker's twine
  • mini stapler
  • watermark ink
  • white embossing powder
  • white ink
After you print and color your images, cut them out with the circle die. I use a piece of washi tape to keep my die in place when I run it through the machine.
 
(When I color multiples of the same image for a project, I don't use as many colors as I would for a single card. I also color one section at a time on each image to keep the look similar.)
 
Die cut your large labels from black cardstock and the ovals from your designer paper.

 
Adhere the oval on top of the label and fold in half lengthwise.
 
If you want to frame the image, die cut or punch a fancy circle to fit behind the image.
 
You can also stamp your sentiment before you assemble the toppers.
 
I stamped one of my favorite Halloween sentiments with watermark ink on black cardstock, then heat embossed it with opaque white embossing powder. I hand cut the banner flag and edged it with white ink, and wiped off the extra ink to create a chalkboard look.

 
Next, fill your bag with treats! I've found the best (and easiest) way to secure the bag once the treats are inside is to fold the label over the bag and secure with a staple. You'll hide the staple with the other elements when you put everything together. (If your bag is long, fold the top down a few times and secure the topper over the folded edge.)

 
Then, layer your other pieces to finish the topper! I tied some twine on the fancy circle before adhering it to the topper base. My last step was to adhere the sentiment. I used both clear and frosted glassine bags to show you the difference between the two.


And, you're done!
 
I hope you've enjoyed this tutorial!  If you have questions about the materials or steps for this project, just let me know in the comment section below!
 
Thanks so much for stopping by today! Make sure to visit the Whimsy and Stars Studio Store to pick up "Halloween Girl" and the other super cute Fall images Mabelle has in the store!
 
Hugs,

Sunday, September 15, 2013

HAPPY SUNDAY AND A NEW PROJECT TO SHARE:)

Hi everyone!  It's Audrey from the DT here with you today, happy Sunday.  I hope you are all having a fabulous week.   My kids had their first full week of school this past week, and it was nice to finally have some time to get my self sorted, although I am still a long way off from being completely organized.  I guess that day won't be coming for a long time! LOL

Anyway, today I am sharing FAITH FLOWERS which you can find at WHIMSY AND STARS STUDIO SHOP and it's available for Instant Download - woo hoo!!  I really enjoyed coloring this beautiful image.  All of Mabelle's images are such fun to color!


I have colored this sweetie with Copics.  I have been playing around with some more daring Copic color combos and techniques, and I hope you can see the results on this card.  I have used papers from DCWV DP and Bazzill CS.  I added a Prima flower and sentiment from A. Jillian Vance Designs that I think fits the image perfectly.  Image cut out with Nellie's dies.  Sentiment cut with Nestie.  Remember, FAITH FLOWERS and all the other of Mabelle's FABULOUS images are available at WHIMSY AND STARS STUDIO SHOP.

Hugs!!

Saturday, September 14, 2013

Autumn Angel

Happy Saturday everyone! Ellie here today, it's my first time posting here on this blog. I am one of the new Fall Guest Designers for Whimsy and Stars Studio.

For today's post I created a card using the super adorable image "Autumn Angel". She's been colored using copic markers. 

The papers I used today are from Basic Grey and Stampin Up. I cut the image out with my cutter bee scissors for a close cut, before adding it to the card.
Here is a list of copic markers in case anyone would like to know what I used.
    Pumpkin - YR000, YR00, YR02, YR04, YR07             Hair: E31, E33, E37
             Face: E000, E00, E21, E11, R20
             Dress: B0000, B00, B02, B04
             Wings: B0000
             Tights: Y11, Y15, Y17
             Acorn: YG92, YG93, E33
             Sunflower: Y11, Y13, Y5, Y17, C3, C5, C7

And finally another view.


Hope you liked my card!
Thanks so much for stopping by!

Enjoy the rest of your weekend!


Friday, September 13, 2013

Celebrate Autumn with Amelia!


Wow, Friday already!! Where does the time go? Lesley here!
Today I would like to share a "Fall" Themed card!

Instant Download Digi Stamp: Amelia

I used Mabelle's sweet stamp called Amelia. 

It is easy to use digital images, you just print them from your printer onto a piece of 81/2" x 11" cardstock!


That sweet flower can work for ANY season, and in this card, I turned it into a sunflower.

Thank you for stopping by!!!

Thursday, September 12, 2013

Congratulations to our September Winner!


Thank you everyone for celebrating with us another fabulous Digi Release & DT Showcase!
I love reading all of your wonderful comments and emails.

Congratulations to
Tricia Traxler (Mrs. GraceWorks)

She won ONE Digi Stamp design of her choice!

Have a wonderful week!

Wednesday, September 11, 2013

9/11

Twelve years ago today, terrorists boarded four passenger planes and set in motion a coordinated suicide attack on the United States.  Three of the planes hit the intended targets - Tower 1 and Tower 2 of the World Trade Center, and the Pentagon.  The fourth plane crashed in Pennsylvania after an extremely brave group of passengers and crew members made an attempt to re-take control of the hi-jacked plane.  Overall, 2,996 people lost their lives on that unforgettable day.

Every year, September 11th is a somber day in the United States.  Everyone who was old enough, can remember exactly where they were and what they were doing when they heard the news.  Most of us spent the next days and weeks fixed to our televisions, radios or computers, watching and listening while trying to comprehend what had taken place.  Never on American soil had such a terrorist attack taken place. 

While time certainly heals, it is important that we NEVER forget those who died.

Today, I am remembering those men and women, by creating a simple project that can easily be re-created by anyone!  And, it's a useful project as well. . .


This bookmark was created using the precious Ribbon Boy image from Whimsy & Stars Studio.  I printed him on white card stock and then colored him in with Copic markers.  I paper pieced the ribbon in honor of our American Flag.  Here is a close-up . . .

The sentiment was my own creation and was simply printed on card stock as well.  Once all the pieces were in place, I added magnet strips on the inside. . .


And here is the bookmark in place. . . .


A very simple project, but a very powerful reminder. . .

May your day be blessed!


Tuesday, September 10, 2013

New Digi Release & Showcase: Pumpkin & Sunflower Teddy

Hello everyone! Welcome to our September Digi Stamp release day! This month we are celebrating the arrival of Fall with a brand new cute digital stamp and a fabulous showcase by our designers.

Pumpkin & Sunflower Teddy

This NEW Digi Stamp is available now as Instant Download:


Giveaway!
ONE random winner from our followers will win ONE DIGI STAMP design of their choice. To enter, make sure to follow our blog & leave a comment on this post. Winner will be announced on Thursday, September 12th both on this blog and on Facebook.

Fabulous Designer Showcase!

Make sure you visit each of our designer's blog posts today
and check additional information and tips on their creations.
Debra (DT) creamcityangels.blogspot.com/

Ellie (Guest Designer) http://livelaughstamp.blogspot.com/

Kathy (DT) willstampforwine.blogspot.com/


Kendra (DT) kendrawietstock.blogspot.com/

Lesa (DT) punkydoodlepapers.typepad.com/

Lesley (DT) www.alwaysplayingwithpaper.blogspot.com

Marcee (DT) inkybird.blogspot.com/

Marsha (DT) www.stampingdownsouth.blogspot.com/

Melissa (Guest Designer) http://8ers.blogspot.com/

Suzanne (DT) sparklingscrapper.blogspot.com

Danni (DT) dannisdreamscrafts.blogspot.com/

Audrey (DT) hippieaud.blogspot.com

Karen (Guest Designer) http://scrappycanuck.wordpress.com/


The Scrapbooking Queen / Theresa (DT)
http://www.thescrapbookingqueen.com/


Angela (DT) http://www.angelakelley.blogspot.com/


Angela (DT) http://www.angelakelley.blogspot.com/


Join our page in Facebook:


Also, we have an exclusive Facebook group for all our fans
where we share our card creations, ideas and surprises! 
Join our group, we would love to have you! Here is the direct link:


Wishing you a wonderful week!